
 What’s better way to rocket-start your Summer Holidays than to design and bake a rocket cake! Are you up for the challenge? Then Let’s get started!
Our edible rocket was designed by the kids for the kids. Maybe the result is not quite Instagram-perfect (but very very tasty), but the project was a great fun with more than a few engineering challenges to overcome and rocket launch systems to research.
We hope you will enjoy it too!
STEP 1: PLANNING
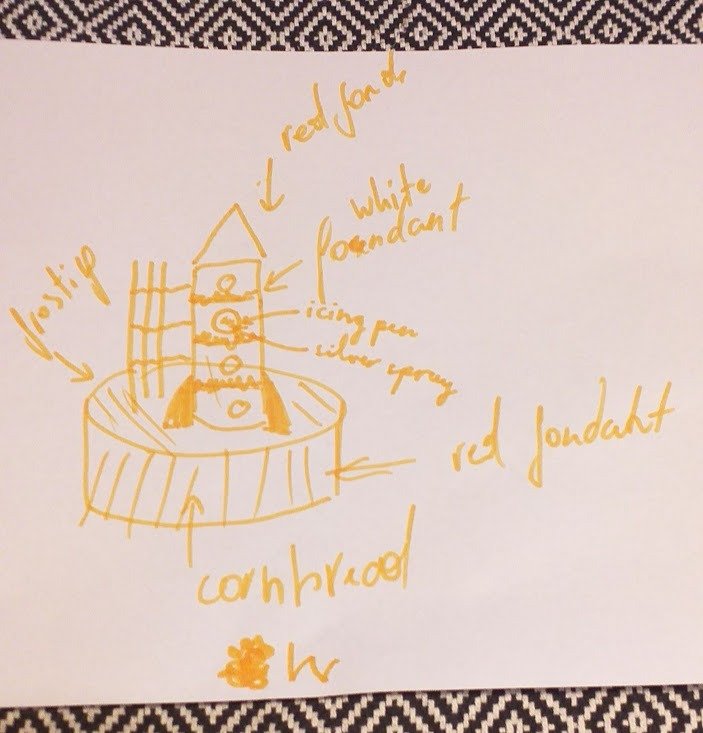
First of all, you need a plan. Take a piece of paper and sketch your rocket . Here is our engineers’ design 🤣: a rocket and an umbilical tower on a launch pad.
Next, choose your cake. Or cakes. You will need one 8 inch round cake for the launch pad and another cake for the rocket. They can be the same type of cake or different, it’s up to you. The rocket cake will be baked in a square 8 inch cake tin and then cut with a round cookie cutter into 5 round mini-cakes.
Please keep in mind that the “rocket cake” has to be suitable for carving. If using your own recipe, go for a firm and moist type of cake. The “launch pad” cake should be firm enough to hold the weight of the rocket. Victoria Sponge is a no-no.
Finally, decide on the finish and decorations you are going to use. For our design you will need
- Cream-cheese frosting
- Ready-made fondant in white and red (for the rocket)
- “Pencil candy” (for the umbilical tower)
- Digestive biscuits (for the rocket fins)
- Edible spray glitter, mini-marshmallows, sprinkles and icing pens
STEP 2: BAKING
Baking is the least creative part of the process, so you can easily leave it to your parents. Of course, they will need your expertise in cake batter tasting and ingredients measuring.
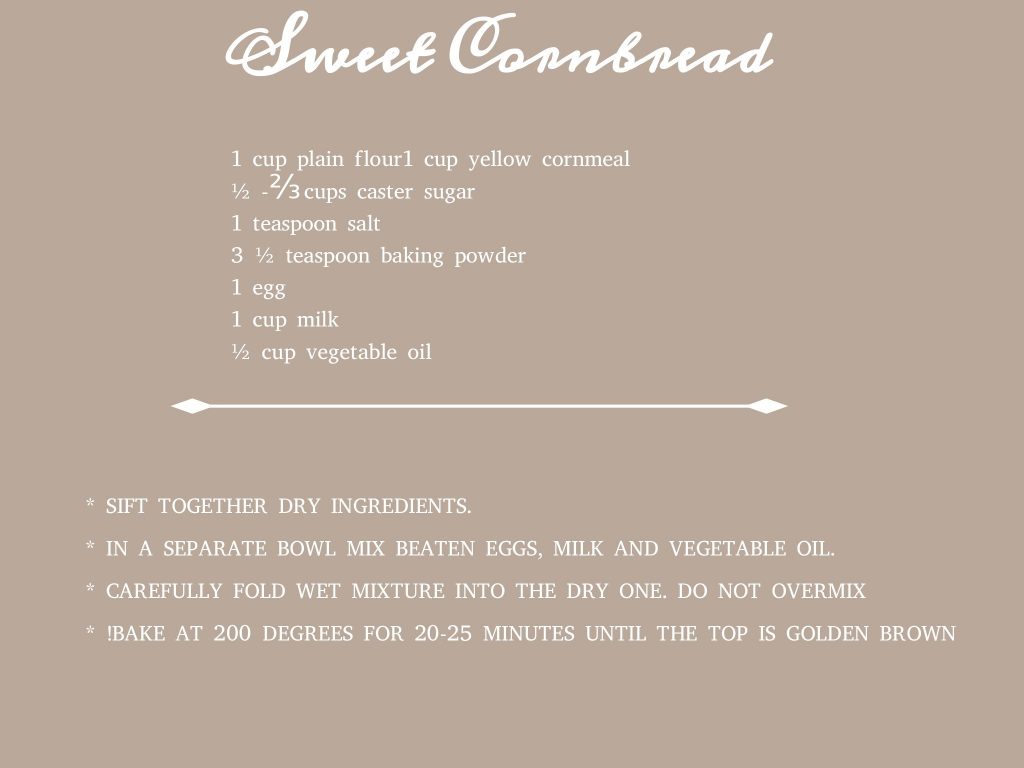
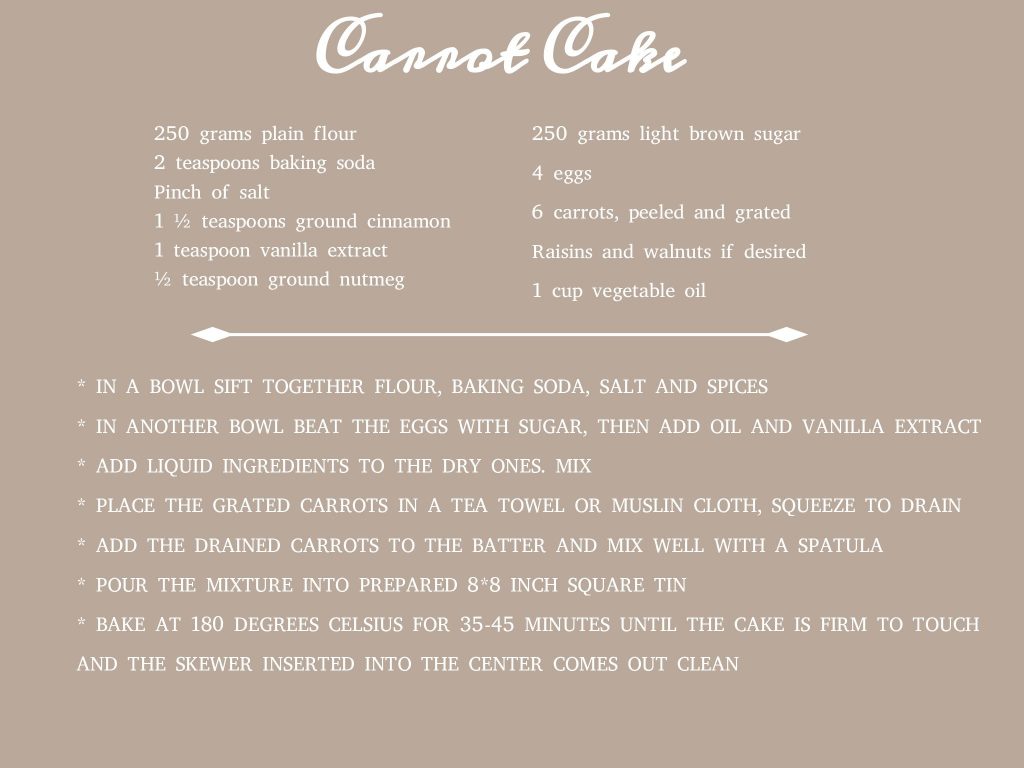
The following recipes are for one square 8*8 inch carrot cake and one 8 inch round sweet cornbread.
STEP 3: PREPARE YOUR BAKED CAKES FOR DECORATION
The round cake does not need a lot of attention. Make sure the cake is completely cool before you ice it. You can also pop it in the freezer for half an hour to make spreading the frosting easier.
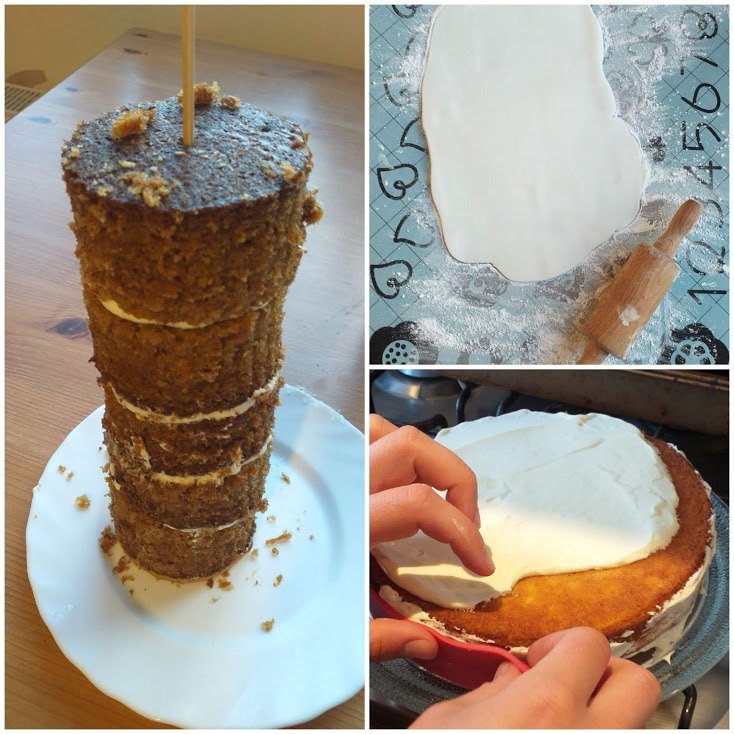
To prepare your square cake, cool it on a wire rack, then freeze for an hour. Next, cut 5 round cakes out of the cake using a 3 inch cookie cutter. If using different size tins/ cutter, make sure that you can achieve the desired rocket height with the number and height of your tiers (for example, you can use more tiers of a smaller size to assemble the rocket).
STEP 4: DECORATING
Launch pad cake
You can “dress up” the launch pad cake any way you like: cover it in fondant, frost it, or, as we did, both. Our launch pad is frosted with cream-cheese frosting with the sides covered in red fondant. To make cream-cheese frosting simply beat together a small package of cream-cheese, a cup of icing sugar and some heavy (aka double) cream.
Rocket cake
To assemble the rocket, stack your round mini-cakes on top of one another with some cream-cheese frosting in between the layers. Run a skewer through all the tiers to keep the structure stable.
Wrap the rocket in white fondant and place on the side of the round base cake. Do not place the rocket in the middle, otherwise there will be no space for the umbilical tower.
Add fins and a nose cone. Our fins are pieces of digestive biscuits covered in red fondant and the nose cone is a leftover cake molded into a cone shape and covered in red fondant.
Now it’s time to go wild with edible glitter, icing pens and sprinkles!
Umbilical tower
It’s a good idea to first find out what an umbilical tower is for and what it looks like. See, for example, NASA Apollo 11 technical report for details on the historic Apollo 11 mission including the rocket and the launch system:
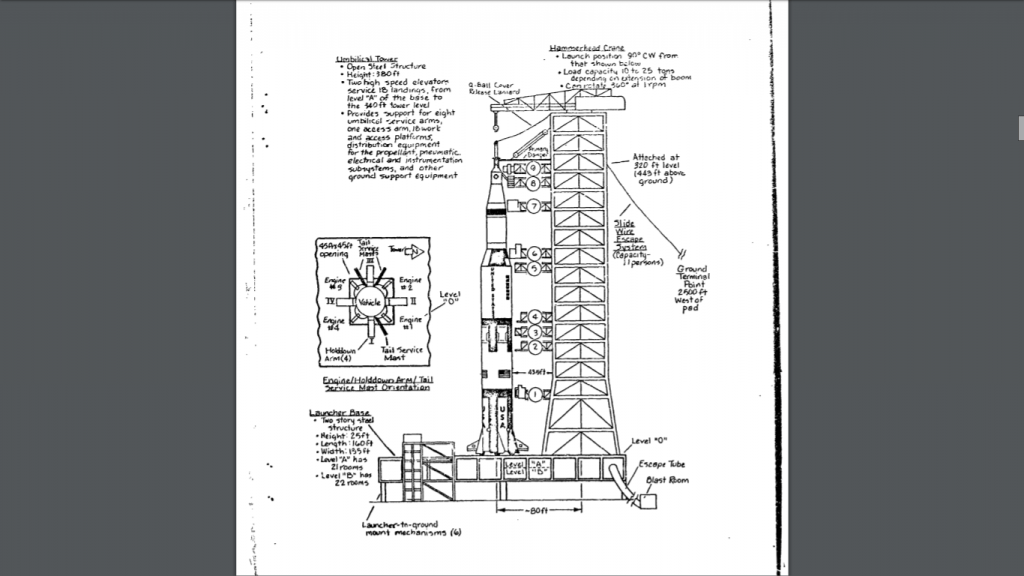
Image: NASA “Technical information summary – Apollo 11 /AS-506/, Apollo Saturn 5 space vehicle“, page 20
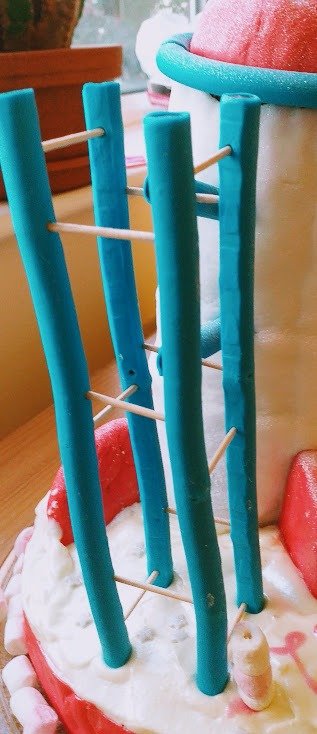
Here is what our candy tower looks like. We used “pencil candy” and lots of toothpicks (cut in half) to make the umbilical tower for our cake , but we hope you will come up with even better designs!
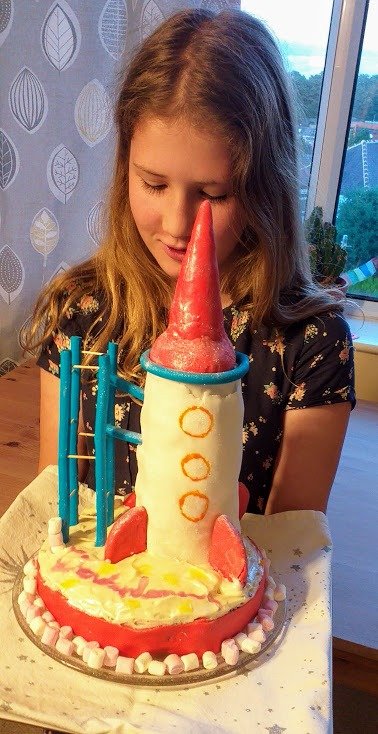
STEP 5: ENJOY
Step back and admire your masterpiece. And don’t forget to share the photographs of your rocket cake with us, we cannot wait to see them!
***
The rocket cake will make a great addition to any space-themed party. If you are planning a “Space Birthday”, check our blog posts Space themed Birthday party? You can do it! for party games and crafts ideas and Making a Perfect Space Party for an out-of-this-world Solar System cake recipe. And did you know that you can book an inflatable planetarium for your special event? We can bring our portable star dome to a venue of your choice and surprise your guests with an immersive presenter-led Planetarium Show about the Universe and everything. For details please see our website wonderdome.co.uk.